

Quickstart
This walkthrough takes you from a beta invitation to a team that is planning and starting real work, following the setup wizard step for step.
Setup is five phases, and the wizard says which one you are in: “Phase 2 of 5” sits above every heading.
What you’ll need
Section titled “What you’ll need”- A beta invitation. If you do not have one yet, apply to the beta.
- About twenty minutes.
- Optionally, your product’s website address and a GitHub account with its repositories, so your team can read both.
- For the last phase, a Linux or macOS machine you can install a small service on.
-
Sign in
Section titled “Sign in”Open your invitation, verify your email, and sign in. On first sign-in the setup wizard opens automatically.
-
Phase 1: your goal
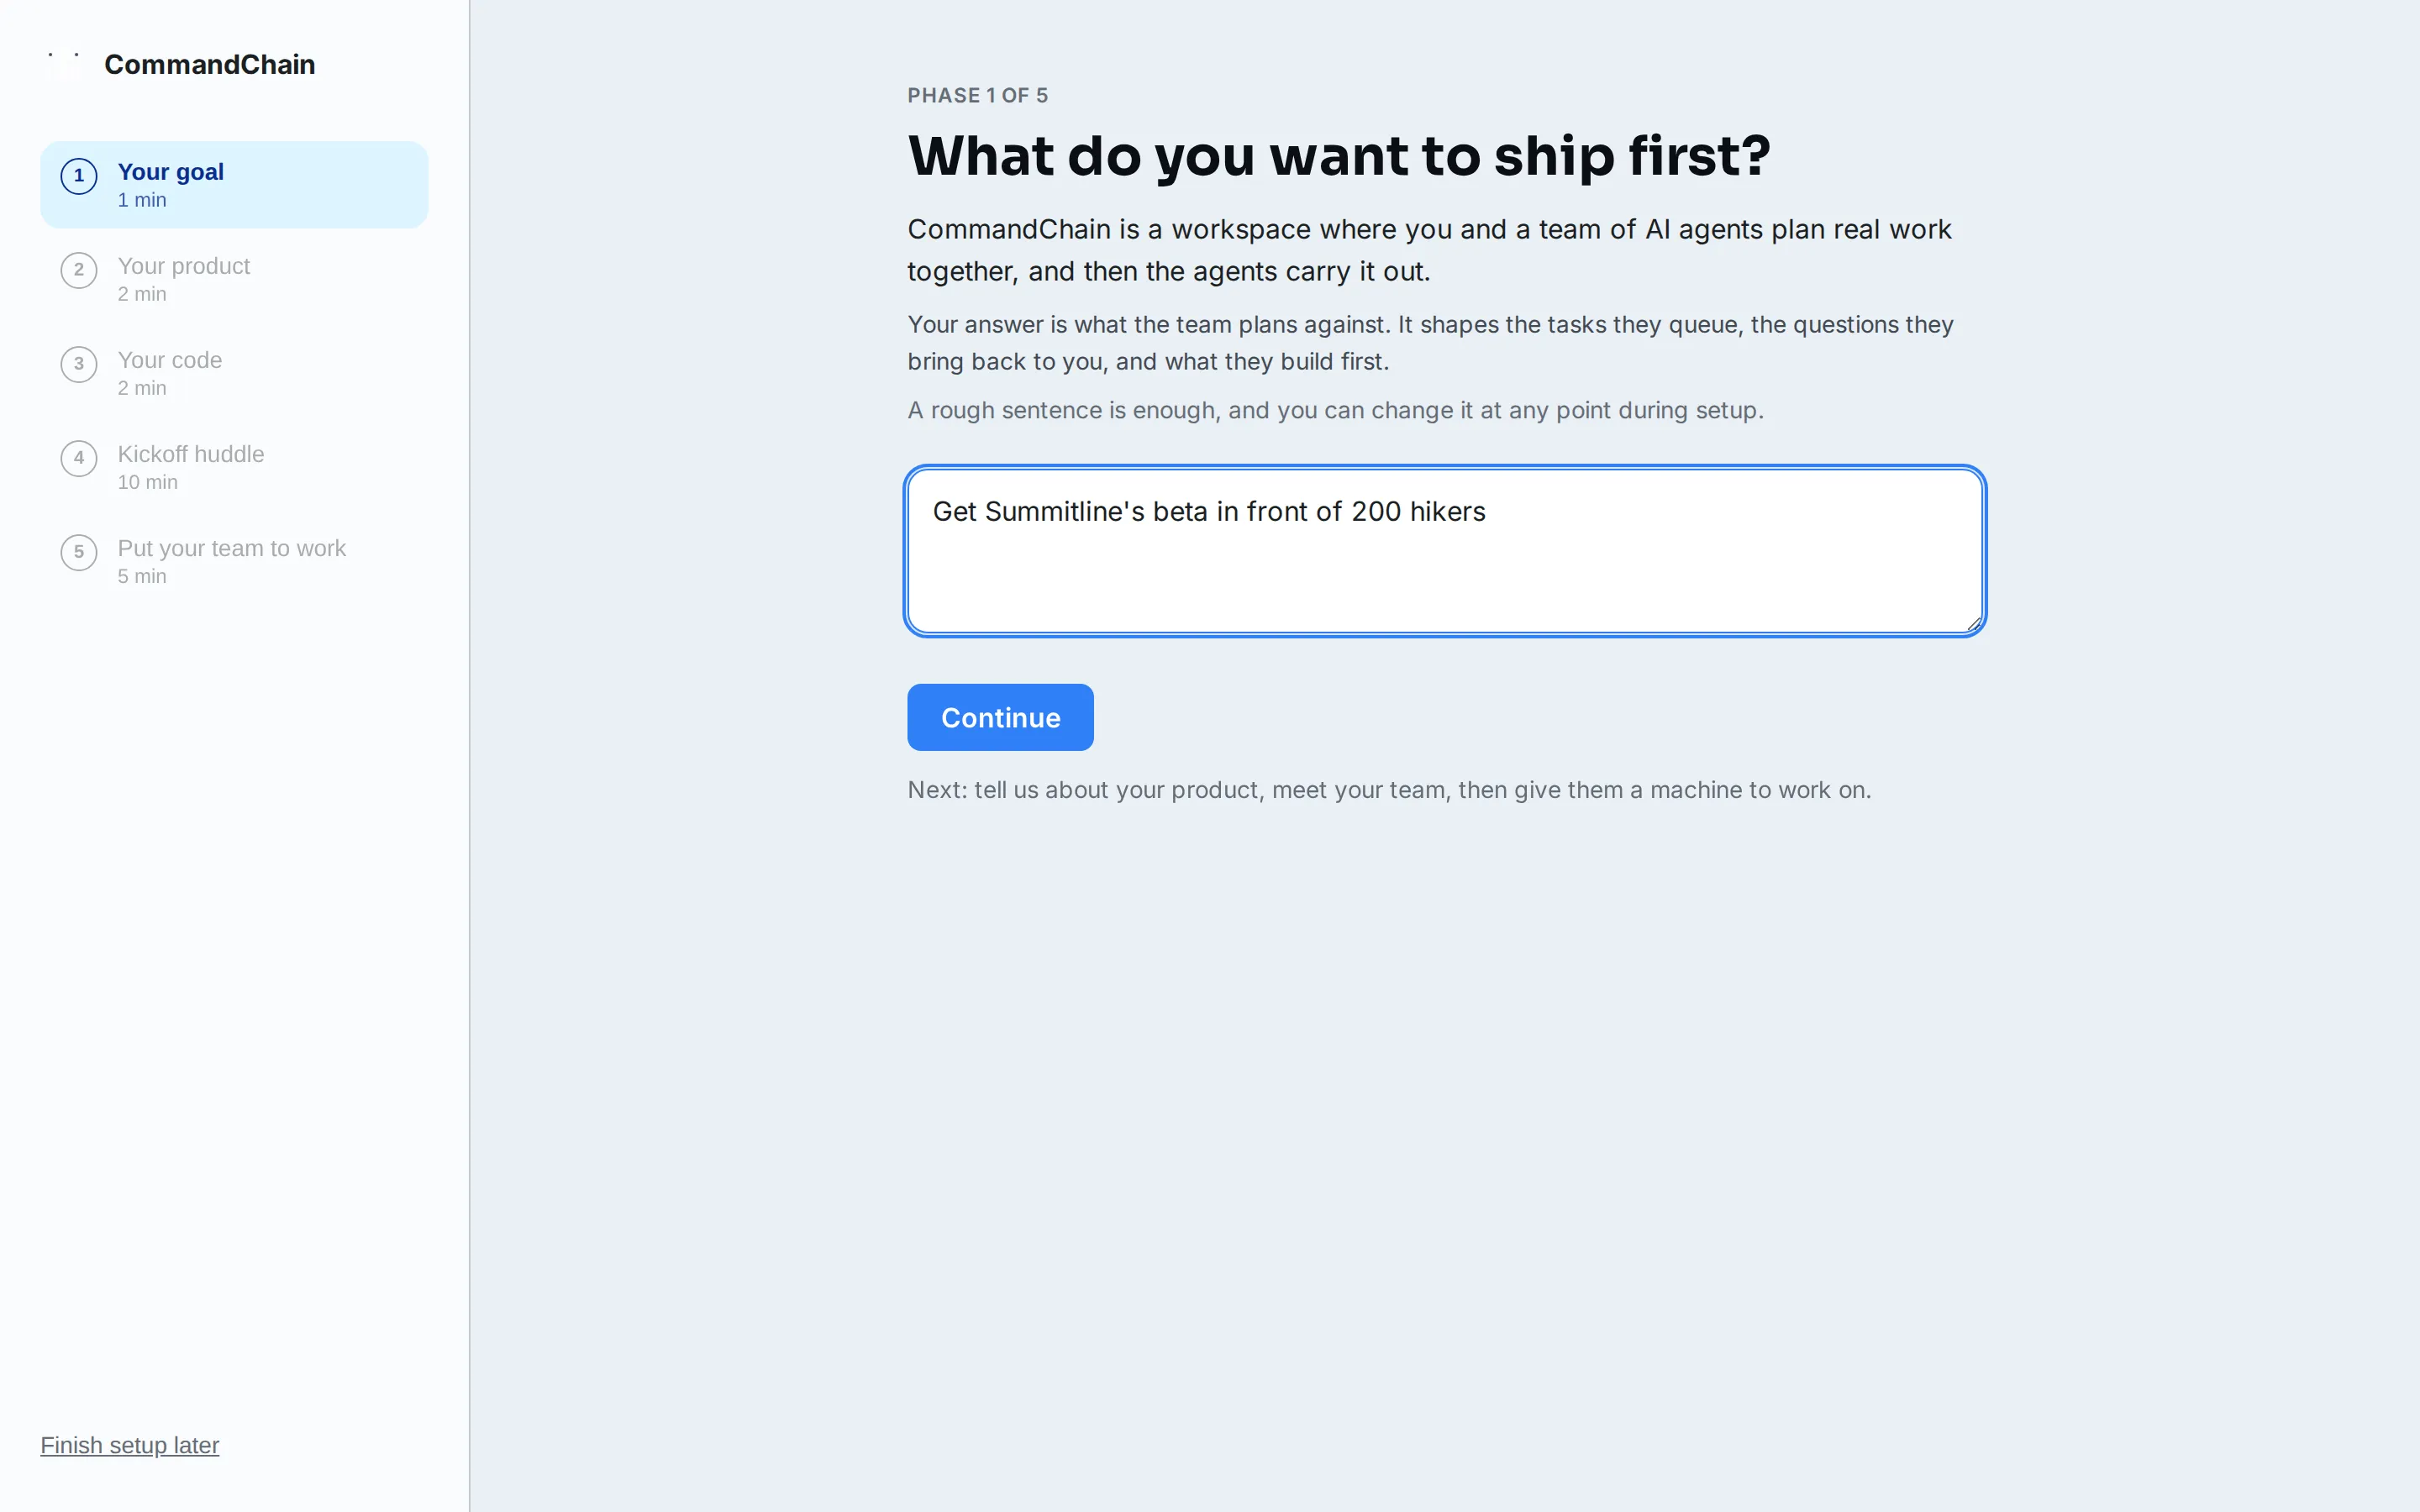
Section titled “Phase 1: your goal”The first screen asks one question: What do you want to ship first?
Type the outcome you want in plain language. It does not have to be a software project: “Get Summitline’s beta in front of 200 hikers” is exactly right. Your team plans against this answer, so it shapes what they queue and build first. Select Continue.
From here on your goal stays on screen under the rail, with Change beside it.
-
Phase 2: teach your team about your product
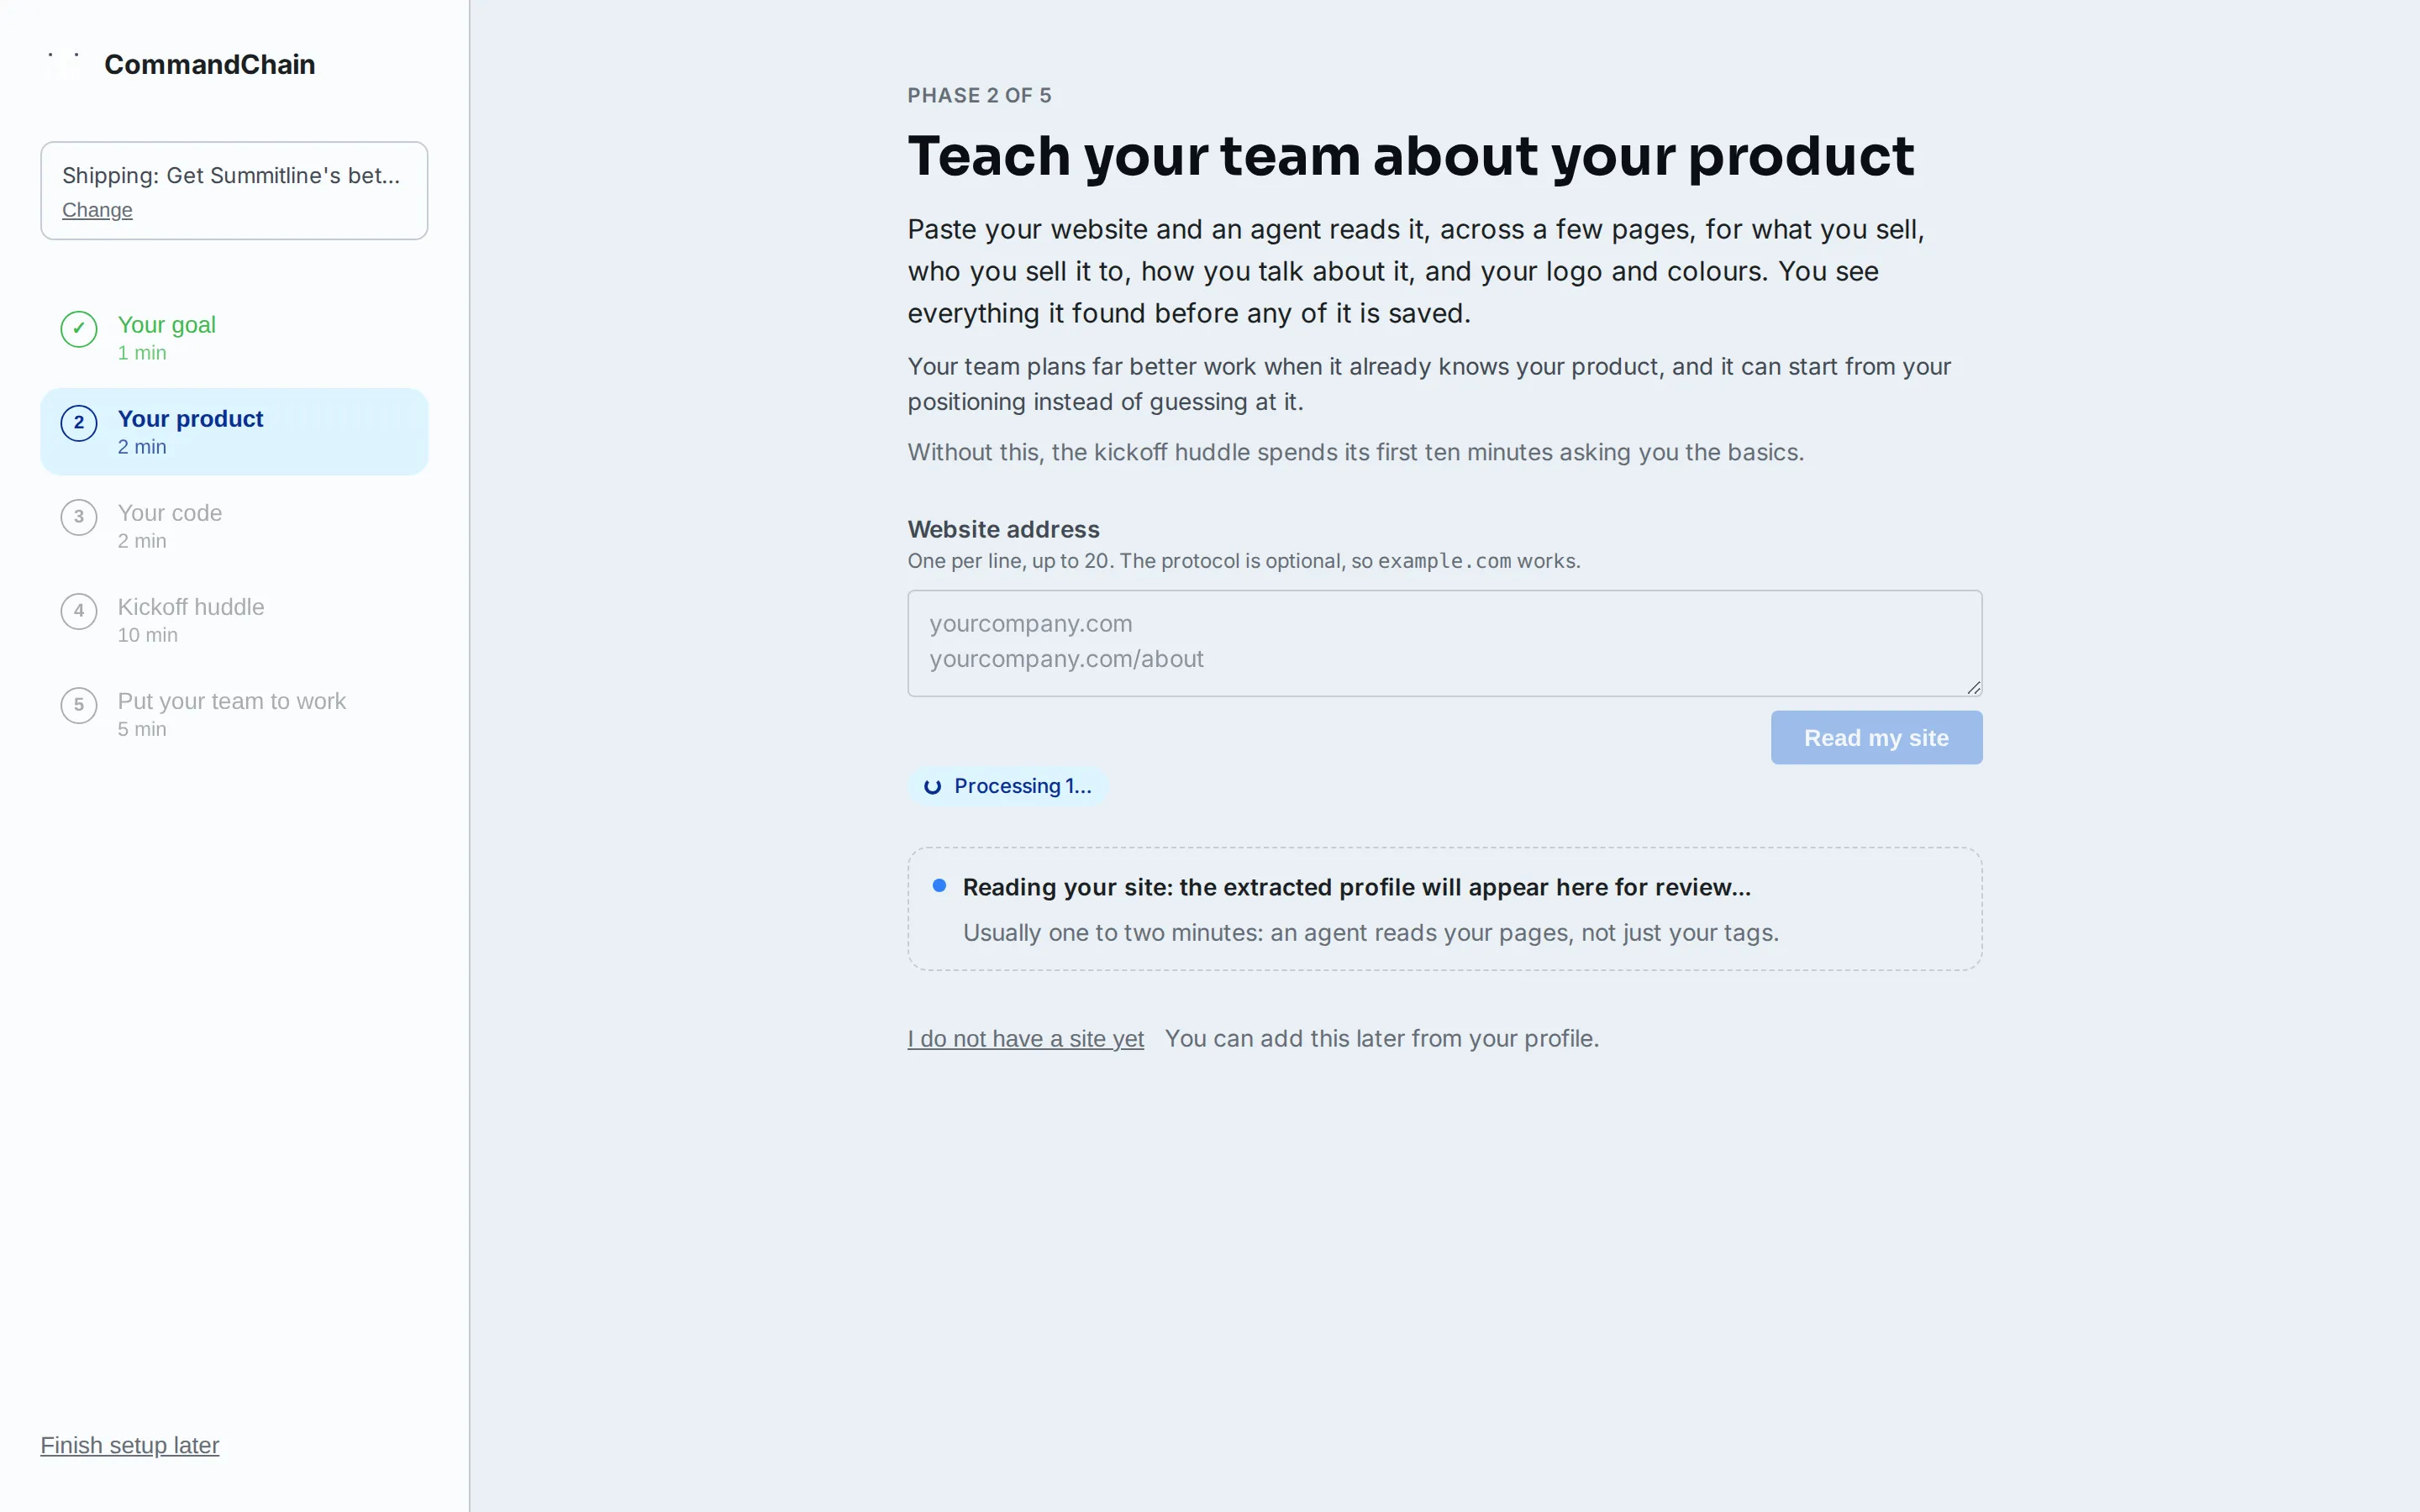
Section titled “Phase 2: teach your team about your product”Teach your team about your product asks for your website. Paste the address and an agent reads it, then proposes your product profile: what you sell, who you sell it to, and how you talk about it. Select Apply to my profile to accept what it learned. No site yet? Use the skip control; nothing is stored when you skip.
-
Phase 3: connect your code
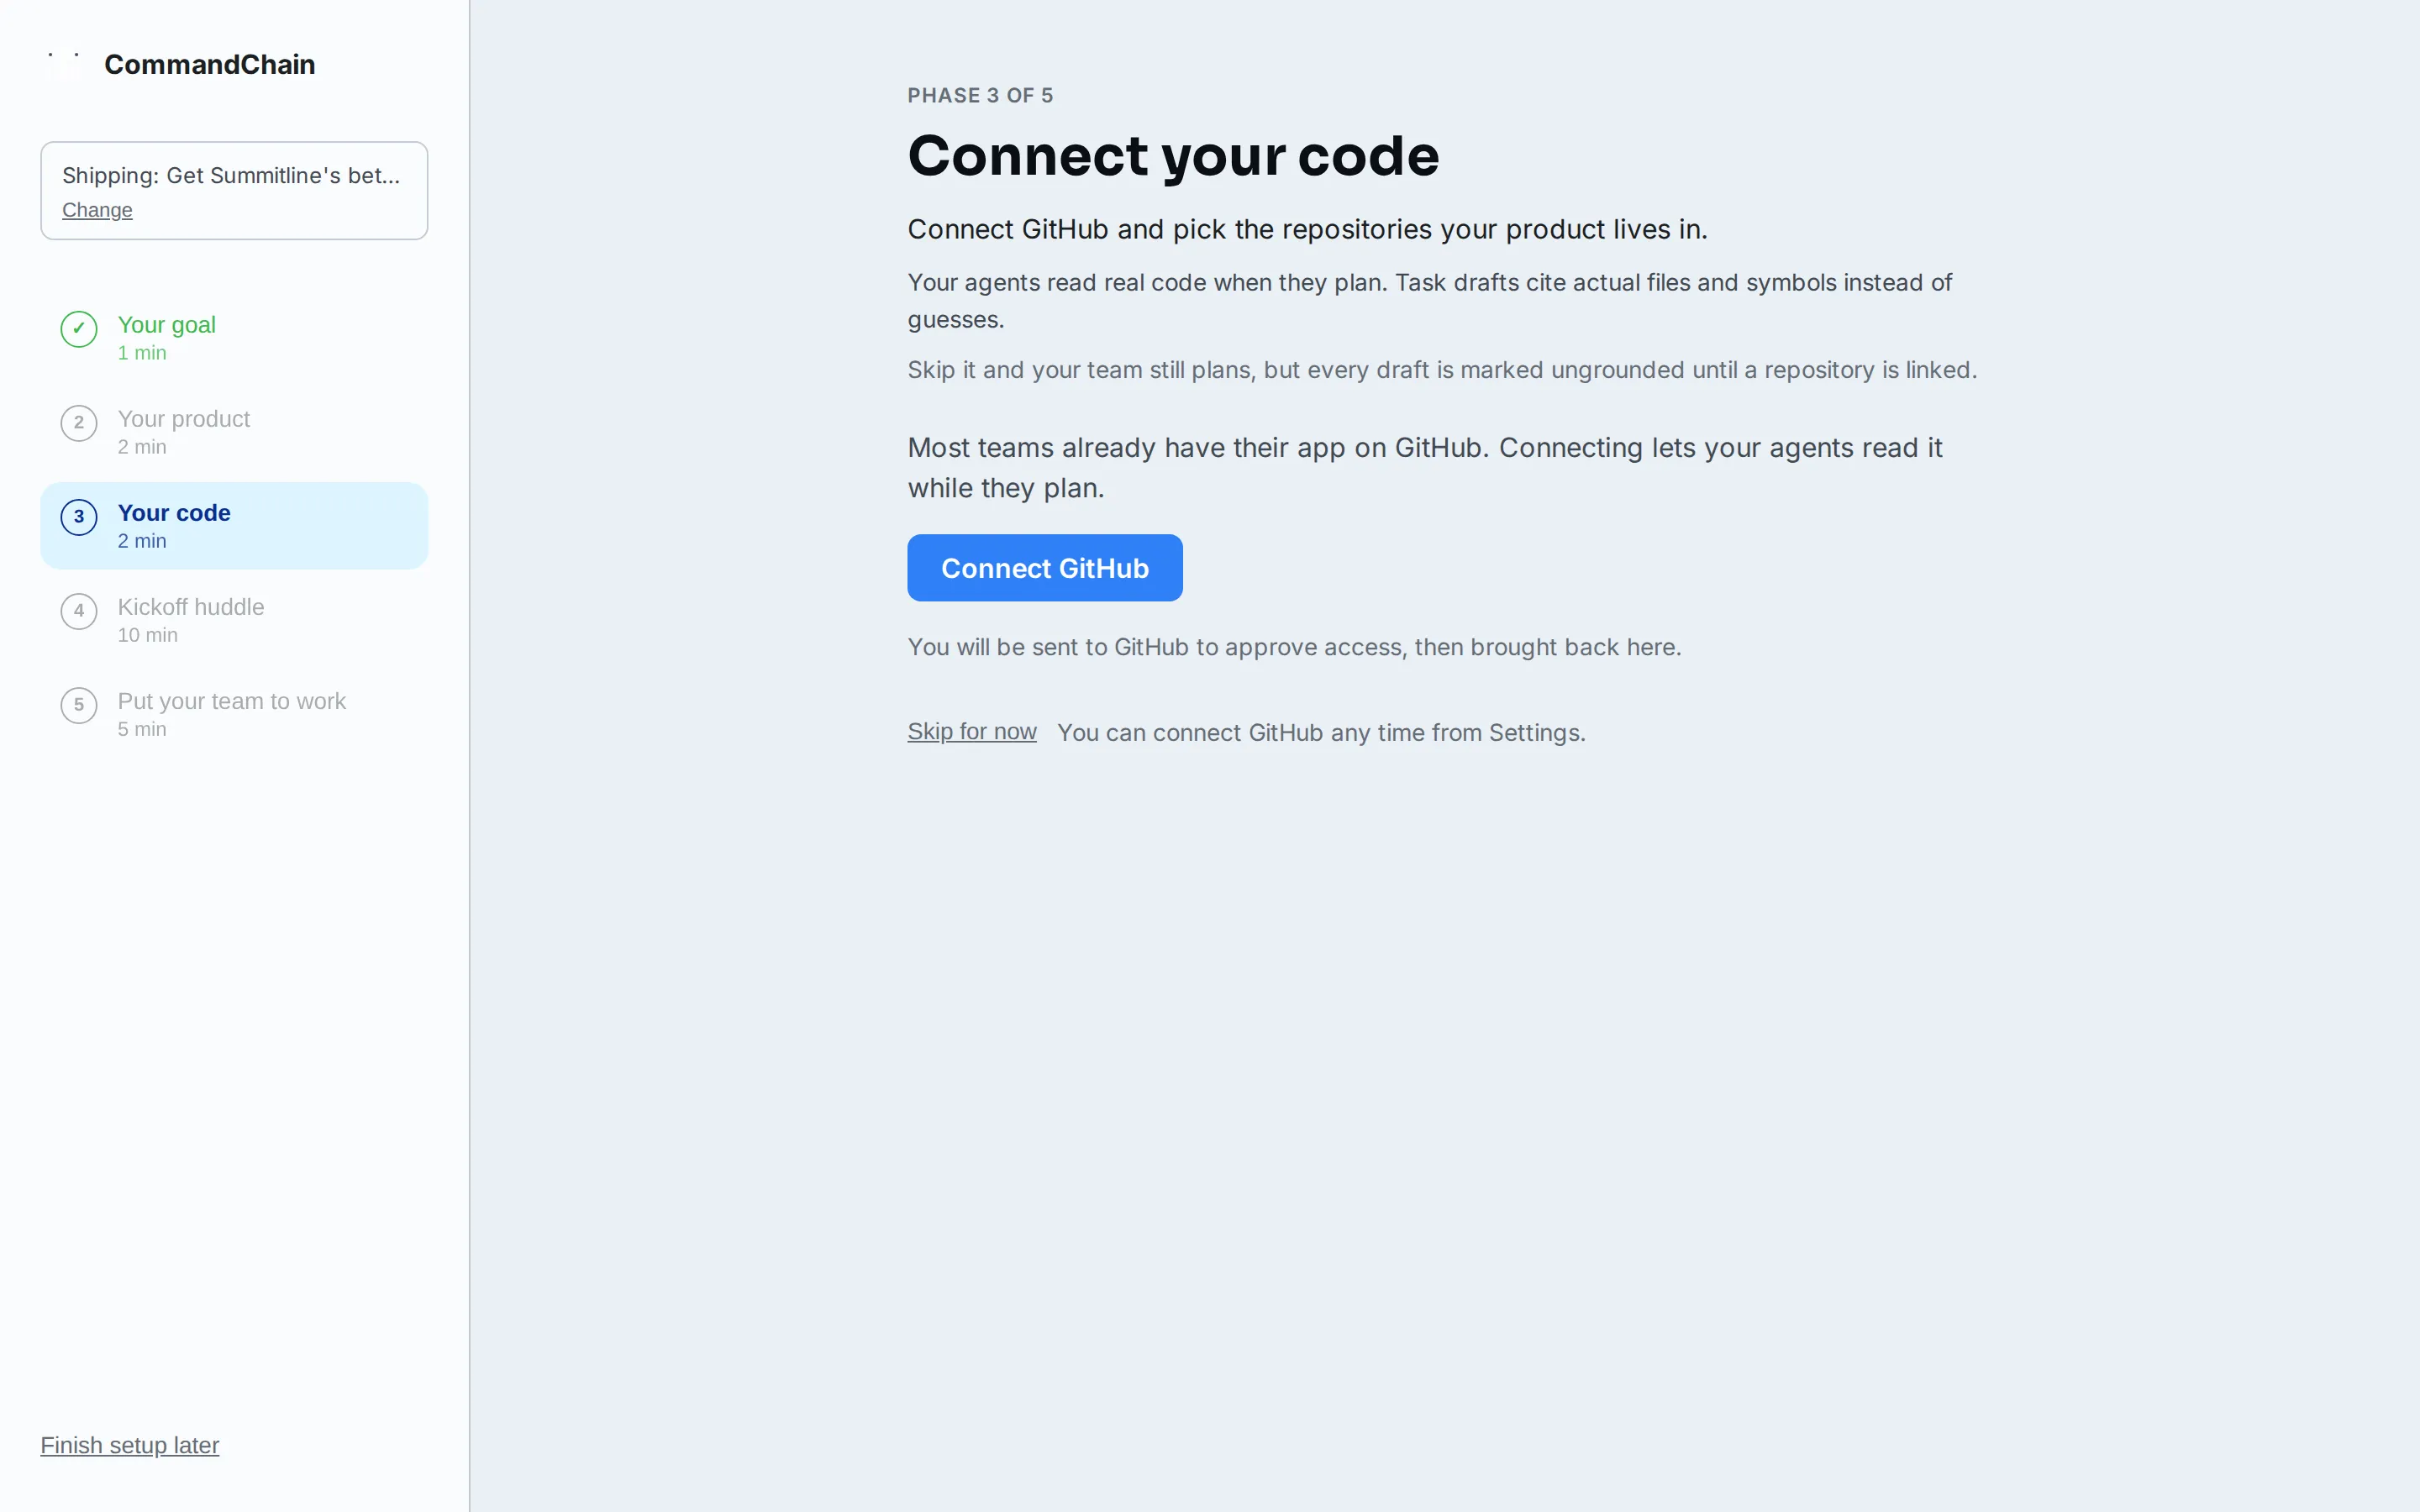
Section titled “Phase 3: connect your code”Connect your code links the repositories your product lives in, so the huddle ahead plans against real code. Select Connect GitHub, approve access on GitHub’s own screen, and pick the repositories to link.
The phase is optional: Skip for now moves you straight on, and connect your code covers what linking changes and every way back in later.
-
Phase 4: meet your team
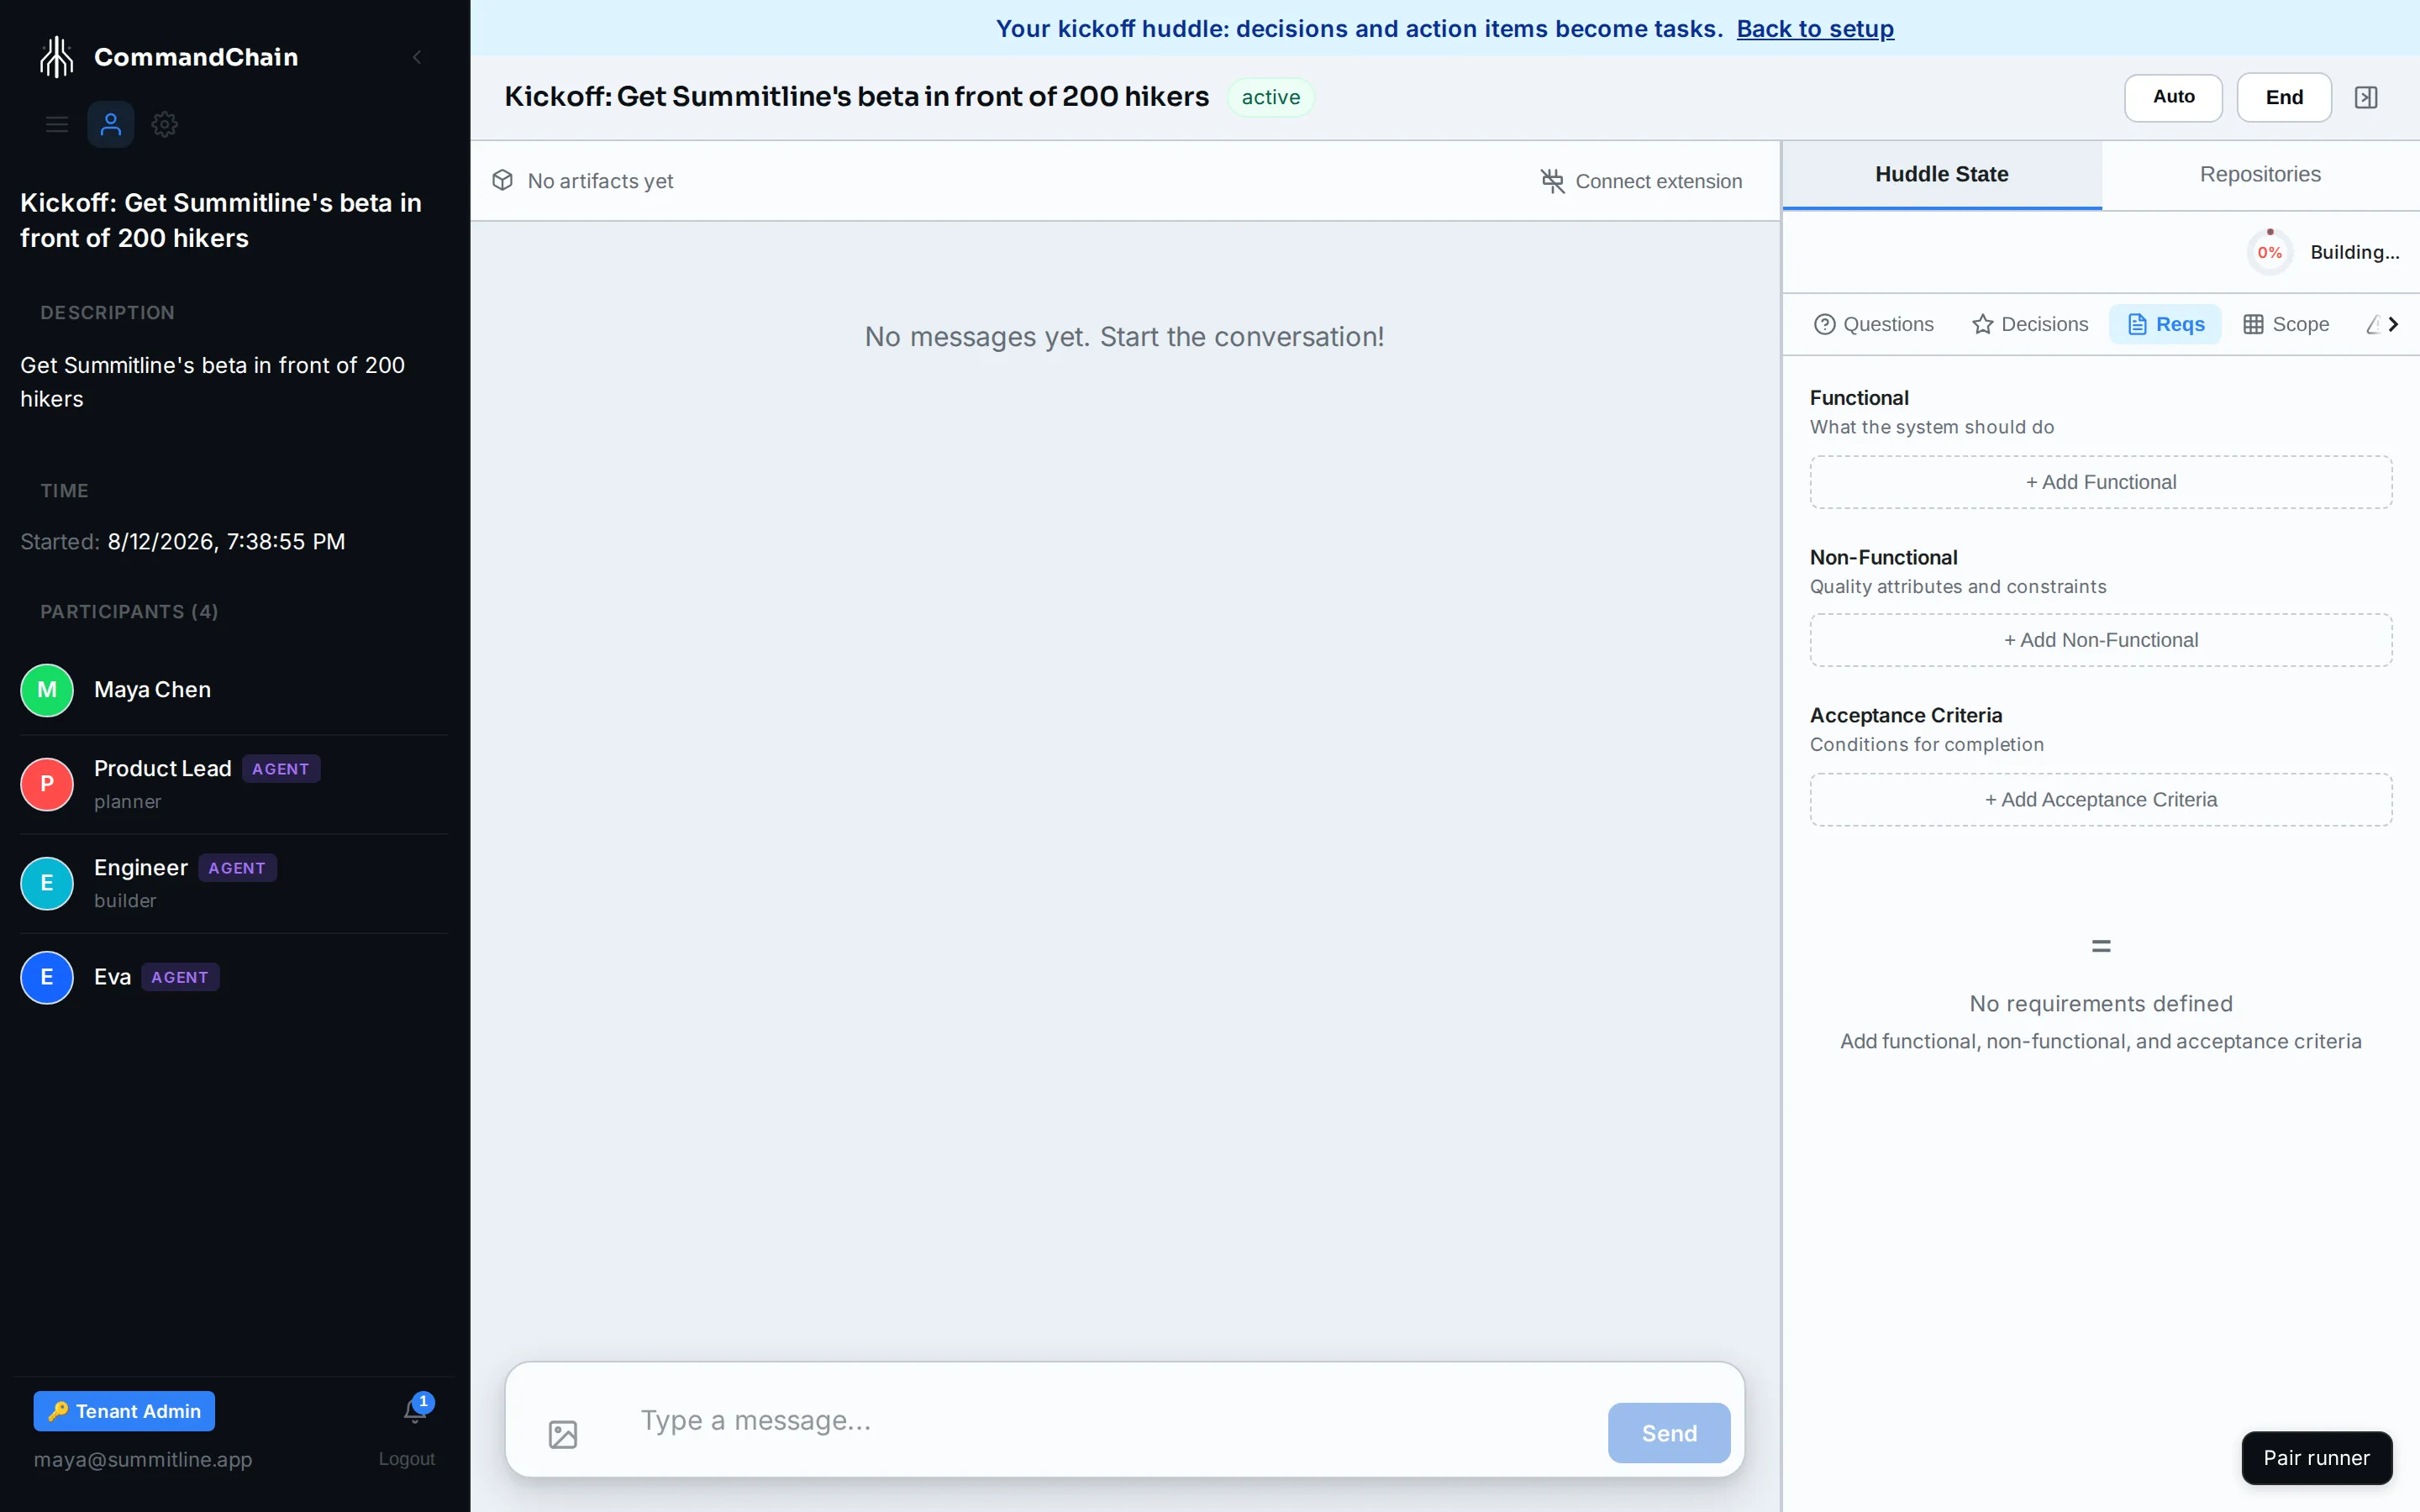
Section titled “Phase 4: meet your team”Meet your team starts a real kickoff huddle. Your Product Lead and Engineer turn your goal into a prioritized plan, and every decision and action item from that huddle becomes a task in your queue. Select Start the kickoff huddle.
Skipped the code phase? This screen says so in one line, and Link a repository first steps back; the primary action is never blocked.
The wizard hands you off to the real huddle. Talk through the goal the way you would with a new hire, ask your team to name the biggest pieces of work, and accept the task drafts they propose. See your first huddle for a closer look.
-
Phase 5: put your team to work
Section titled “Phase 5: put your team to work”The last phase is Give your team a machine to work on. A runner is a small service on a machine you own, and it executes the work your team just planned. Until one is online your team can plan but cannot build.
Copy the one-liner, run it on that machine, and approve the runner in your browser. It also signs the runner in to a coding agent. If anything is left, open the runner with
commandchain-runnerand follow its prompt. Rather not install anything? Select Run on CommandChain servers instead.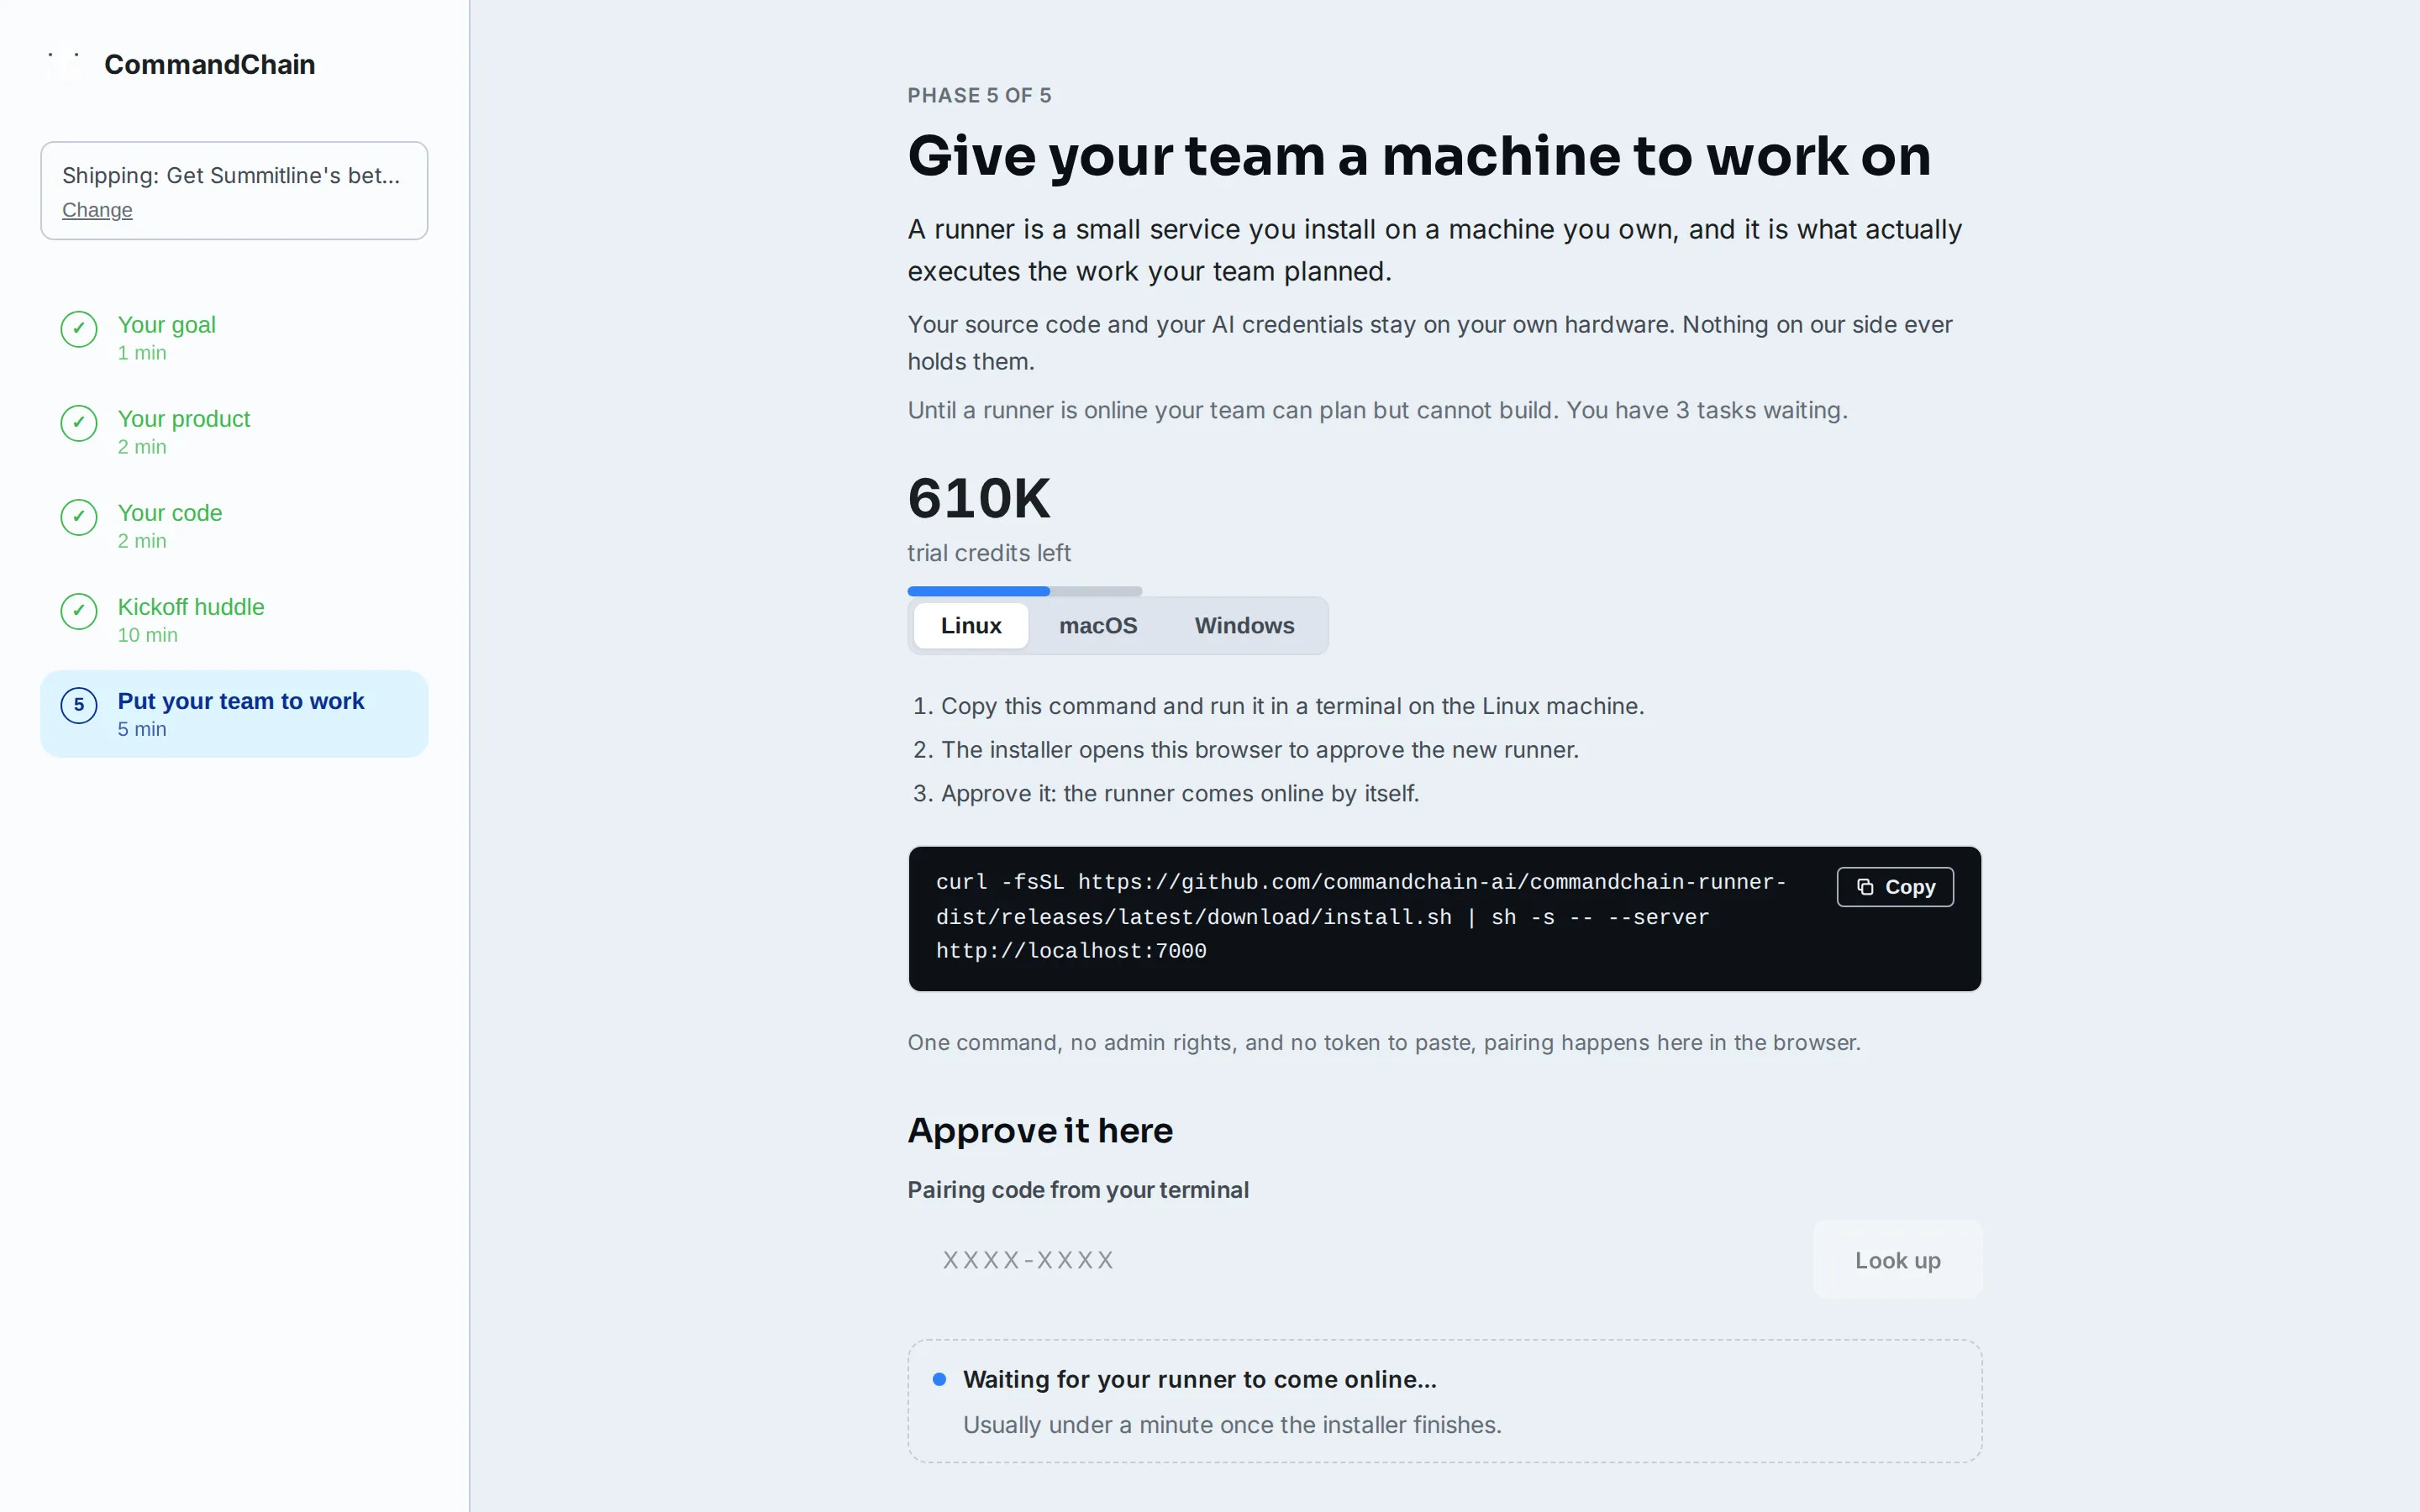
Once the runner is online, the phase resolves to Your team is working on your goal. Select Go to my workspace, or Watch the first task run to follow one end to end.
If your setup runs the other way around
Section titled “If your setup runs the other way around”Some accounts see the runner phase before the kickoff: connect the machine first, then meet the team. The wizard decides this once, at signup, and never changes it underneath you. The only difference is that the last screen reads Your team is ready, and its main action starts the kickoff huddle.
What you have now
Section titled “What you have now”- A stated goal your team plans against, visible on every screen.
- A company profile grounded in your real product.
- A linked repository, if you connected one, so drafts cite real code.
- A kickoff huddle with a summary and a set of tasks.
- A paired runner, so your agents can execute for real.
- A trial credit balance funding your team until your runner takes over.
Next steps
Section titled “Next steps”- Connect your code: what linking changes, and how to come back to it.
- Install a runner: the full pairing walkthrough.
- Your first task: watch a task run end to end.
- Trial credits: how the trial balance works and what happens when it runs out.